Clean the connection points first and try a reversible fix like tape shims or a tested micro-film tightener before you reach for glue. Reversibility is the guiding rule for any collector brick that’s come loose: you want your fix to come off as easily as it went on. If cleaning and gentle mechanical tricks don’t restore the clutch, replacing the part with a matched piece almost always beats permanent adhesive, and some sellers stock sets and spares that make swapping a worn brick simple.
TL;DR:
- Cleaning the mating surfaces with a brush and isopropyl alcohol can often restore a loose brick without further fixes.
- Applying minimal tape or micro-film tighteners provides a reversible way to improve clutch strength before considering permanent solutions.
- Gluing should be a last resort, as it permanently bonds parts and reduces rebuildability, especially avoiding hot glue due to warping risks.
- Replacing worn or cracked parts with exact matches is often more reliable than attempting ineffective or risky repairs like glue.
- Routine maintenance, such as avoiding repeated stress on the same joint and storing models properly, helps prevent loose bricks from recurring.
Table of Contents
- Quick Nonpermanent Fixes That Restore Clutch Without Harming Parts
- Permanent and Semi-Permanent Fixes: What They Cost You
- Finding the Right Replacement Brick
- Preventive Care to Keep Bricks From Loosening Again
- Why We Favor Reversible Fixes First
- Where to Find Matched Parts and the Right Tools
- Sources
- FAQ
Quick Nonpermanent Fixes That Restore Clutch Without Harming Parts
Most loose-fitting bricks aren’t actually damaged. They’re dirty, worn from repeated builds, or slightly deformed from years in a bin. Before you touch anything sticky, work through the low-risk fixes first.
- Inspect and clean the mating surfaces. Dust, oily fingerprints, and grime build up inside tubes and around studs, and that film is often the entire reason a brick feels loose. A soft brush knocks out loose debris, and a cotton swab lightly dampened with isopropyl alcohol lifts the rest without attacking the ABS plastic.
- Try a tape or micro-shim fix. A tiny strip of thin tape wrapped around a Technic pin, or a sliver placed inside a stud tube, adds just enough friction to restore snap-fit. Keep it minimal. Too much bulk deforms the tube instead of tightening it.
- Consider a removable liquid tightener. Builders on the Eurobricks forums have tested micro-film tighteners that add a thin, washable layer to worn studs. Test any formula on a spare piece first, confirm it rinses off with water, and never apply it to a part you can’t replace if it goes wrong.
- Rebuild Technic joints mechanically. Loose pins often respond better to a wrap of thin tape or a shrink-tube sleeve than to any liquid fix, and swapping in an axle stop or bushing can restore retention without adding a single drop of adhesive.
A few tools make this work far easier. Keep a brick separator on hand, along with lint-free cloths, small scissors for trimming shims, and a magnifier for checking stud wear up close.
Pro Tip: Test any cleaning agent or liquid tightener on a spare or low-value brick first. If the color or texture changes even slightly, don’t use it on a piece you care about.
Permanent and Semi-Permanent Fixes: What They Cost You
Glue solves the tightness problem for good, but it solves it a little too well. Once a joint is bonded, you generally can’t take the model apart again without breaking something.
Hobbyists reach for a few different products depending on how permanent they want the fix to be:
- Repositionable tacky adhesive holds lightly and peels away later, making it the safest bridge between a temporary fix and full permanence.
- Cyanoacrylate (super glue) bonds fast and strong, but it’s essentially a one-way trip. Once cured, separating the pieces usually means damaging one or both.
- Solvent-based plastic welds actually fuse the plastic at a molecular level. This is the most permanent option on the list, and it’s the hardest to undo cleanly.
A detailed comparison of LEGO adhesive options lays out the tradeoffs well: strength versus reversibility, discoloration risk on visible surfaces, and the fact that fumes from solvent welds demand real ventilation, not just a cracked window. That same guide flags hot glue specifically as a method to avoid, since the heat can warp ABS and leave a permanent blemish. Even collectors who accept some glue use tend to reserve it strictly for display pieces where rebuildability was never the point.
If you do glue, use a tiny amount, dry fit the pieces first to check alignment, and clamp lightly while it cures instead of forcing a bond. Skip adhesive entirely on rare or high value elements, anything where color matching matters, or any piece you might want to rebuild into a different set later. Once cured, solvents or heat can sometimes loosen a bond, but the risk of melting or discoloring the plastic in the process is real, and there’s no guarantee you’ll get the part back to its original state.
Finding the Right Replacement Brick
Sometimes the smarter fix isn’t a fix at all. A cracked tube, a permanently flattened stud, or a joint that’s lost its internal support ridge won’t hold no matter what you try, and that’s the point where sourcing a matched replacement makes more sense than fighting the original part.
Before you buy a replacement, check these details against the piece you’re losing:
- Clutch fit. Does the stud or tube grip with the same resistance as the surrounding parts, or does it feel noticeably tighter or looser?
- Stud and tube geometry. Mold variations shifted slightly across production eras, so an older part and a current one aren’t always identical underneath.
- Color and shade match. Even the same official color name can shift slightly between production runs, which matters a lot on a visible exterior panel.
- Texture. Matte and glossy finishes can differ between reissues of the same part number.
When buying from a listing you can’t inspect in person, ask the seller for extra close-up photos of the stud pattern and tube interior. Product pages that show detailed images and clear building instructions, like the listing for the Brick Bank Building 10251, give you a good sense of what a trustworthy listing should include before you commit to a purchase.
Once the replacement arrives, use a brick separator instead of a screwdriver or butter knife to pull the old piece free. Organize the swapped parts in labeled trays as you go, and apply gentle, even leverage rather than prying hard at one edge, which is how studs get sheared off in the first place.
Preventive Care to Keep Bricks From Loosening Again
A little routine maintenance goes a lot further than any glue or tape trick. Most looseness is cumulative wear, and cumulative wear is preventable.
- Vary your build and disassembly points. Repeatedly snapping and unsnapping the exact same connection wears it out faster than spreading that stress across a model.
- Store finished builds away from heat and direct sunlight. High temperatures soften ABS just enough to let studs deform under their own display weight, and UV exposure fades and stiffens plastic over time.
- Use a display case for anything fragile or valuable. Enclosed cases limit dust buildup and accidental bumps, both of which contribute to loosening. Collector guides on preserving display builds consistently favor cases and reversible support over gluing pieces down.
- Recondition high-use areas periodically. Pull apart the joints that see the most handling, check the clutch, and swap in a donor part the moment you notice consistent slack.
Pro Tip: If a stud feels loose on three or more surrounding pieces at once, that’s usually wear, not a one-off defect. Flag that part for replacement instead of repeated re-gluing.
Retire a part once you see visible flattening, a hairline crack at the tube base, or discoloration from a previous repair attempt. Trying to coax more life out of a compromised piece almost always costs more time than sourcing a fresh one.
Why We Favor Reversible Fixes First
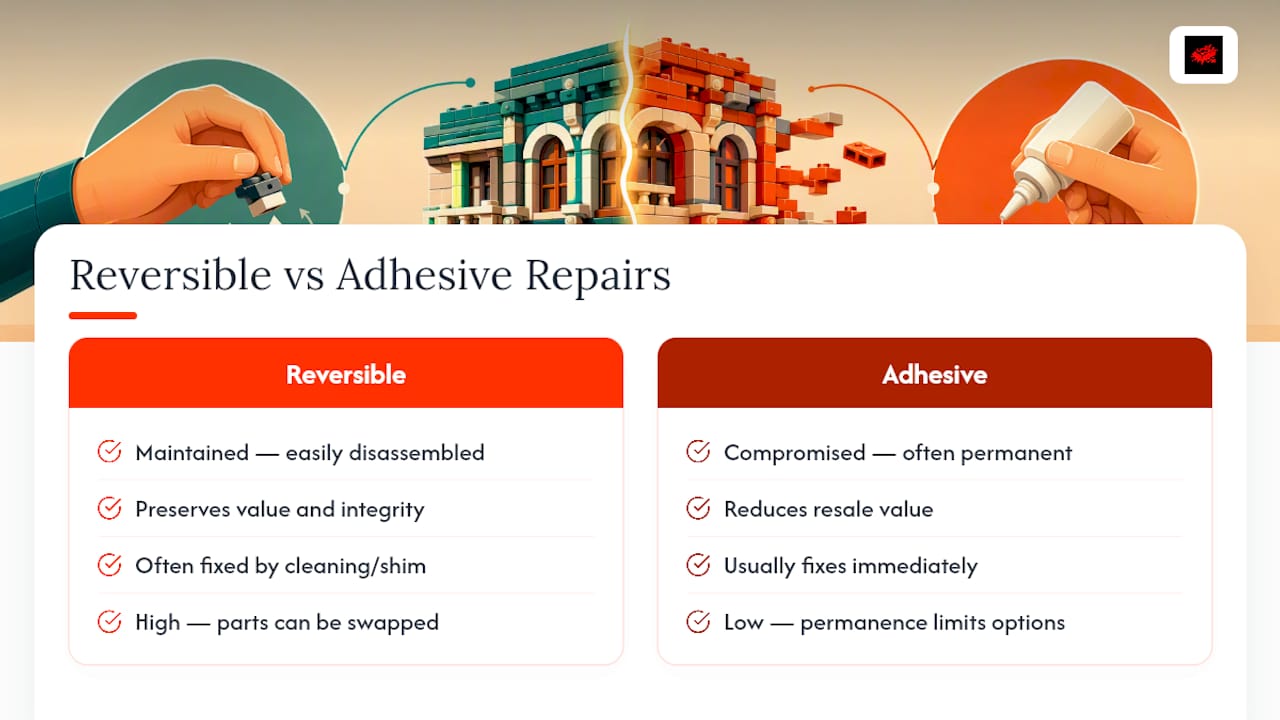
Collectors ask us constantly whether gluing is ever the “real” fix, and our honest answer is: rarely. The value of a LEGO or LEGO-compatible set isn’t just the plastic. It’s the ability to take it apart, rebuild it differently, or pass it on intact. Every permanent adhesive you apply chips away at that flexibility, even when it solves the immediate wobble.
What gets underestimated is how often a loose brick is actually a cleaning problem wearing a permanence costume. Builders jump straight to super glue when a swab of alcohol and a spare shim would have done the job. On the flip side, some collectors avoid replacement parts out of a misplaced sense that swapping a piece is “cheating.” It isn’t. A worn stud replaced with a matched part preserves the build far better than a glued joint ever will.
Some product pages with detailed photos and building instructions help because matching a replacement part correctly matters more than most builders assume. When a part is rare or the match is critical, reach out to support before you guess.
— Affordable Bricks Editor
Where to Find Matched Parts and the Right Tools
Some sources offer not just new sets but also exact pieces and tools that solve the problems covered above.
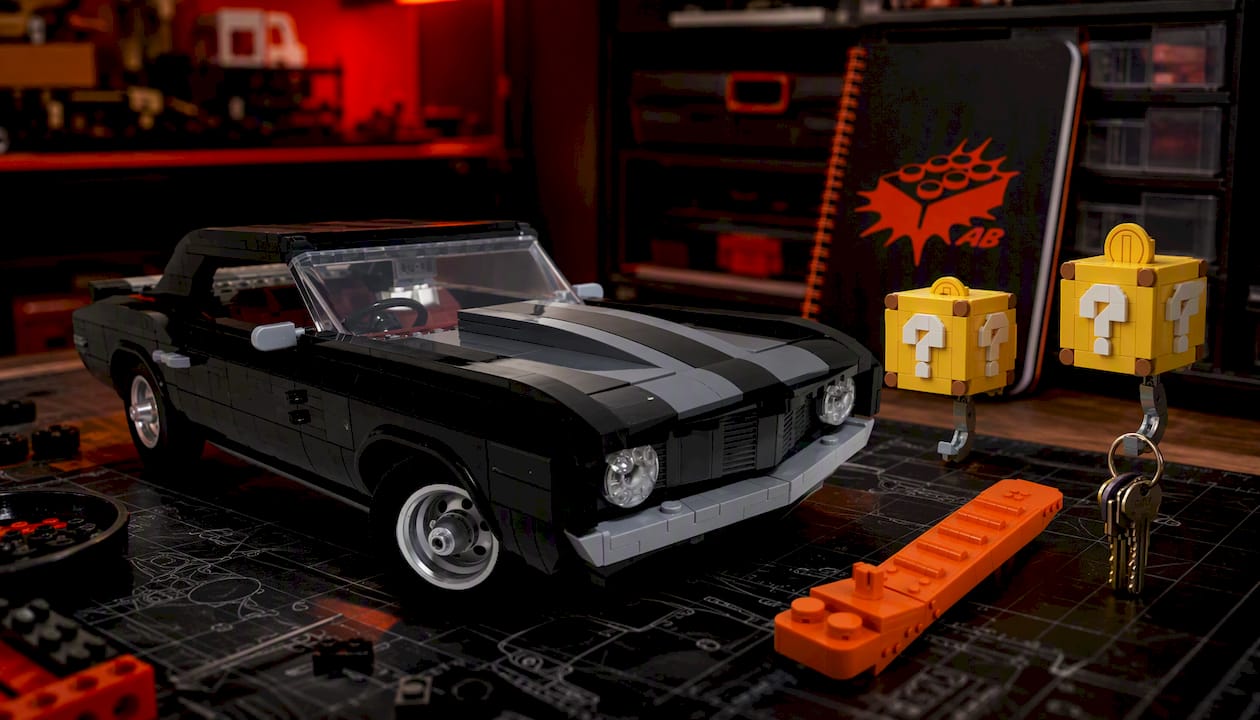
If a wheel well or fender panel has worn out on your build, the Retro Muscle Car 10304 is a good example of a themed set where donor pieces are easy to identify and swap in cleanly. For safe disassembly on any repair or replacement job, the Upscaled Brick Separator 0026 reduces the stud and tube stress that makeshift prying tools cause, and it belongs in every builder’s kit. Once your model is repaired, keep loose parts and spares organized with something like the Mystery Block Key Holder 3057, which doubles as tidy storage for the small pieces that go missing fastest.
Browse the full collection of replica sets, themes, and seasonal kits or check the vehicle collection if your repair involves a car or truck build. If a part is rare or hard to match by eye, contacting seller support with photos can help identify the needed piece. Listings are often designed around compatibility, so replacements ordered generally fit.
Sources
- Safe liquid tightener for loose brick connections - LEGO Technic, Mindstorms, Model Team and Scale Modeling - Eurobricks Forums
- Should You Glue Your LEGO® Sets? Pros and Cons
FAQ
What’s the safest first step to fix a loose LEGO brick?
Clean the stud and tube with a soft brush and a small amount of isopropyl alcohol before trying anything else. Most looseness comes from dirt buildup rather than actual damage, and cleaning alone often restores a proper clutch fit.
Should I glue a loose brick back together?
Glue is a last resort, not a first fix, because it’s usually permanent and can lower a set’s rebuild value and resale appeal. Adhesive guides recommend saving glue for display pieces you never plan to disassemble again.
How do I know if a brick needs replacing instead of repairing?
Cracked tubes, flattened studs, or joints missing their internal support ridge won’t hold no matter what fix you try, so replacement is the more reliable option. Check clutch fit, color match, and mold texture against the surrounding pieces before buying a replacement.
What tools do I need for a DIY brick repair?
A brick separator is essential for removing parts without stressing the studs, alongside lint-free cloths, isopropyl alcohol, and a magnifier for close inspection. These basics cover cleaning, disassembly, and part swapping for most repair jobs.
Does Affordable Bricks sell replacement parts for loose bricks?
Affordable Bricks lists sets and product pages, including options like the Retro Muscle Car 10304, where matched donor pieces are easy to identify for repairs. Current pricing and availability are listed directly on each product page at Affordable Bricks.